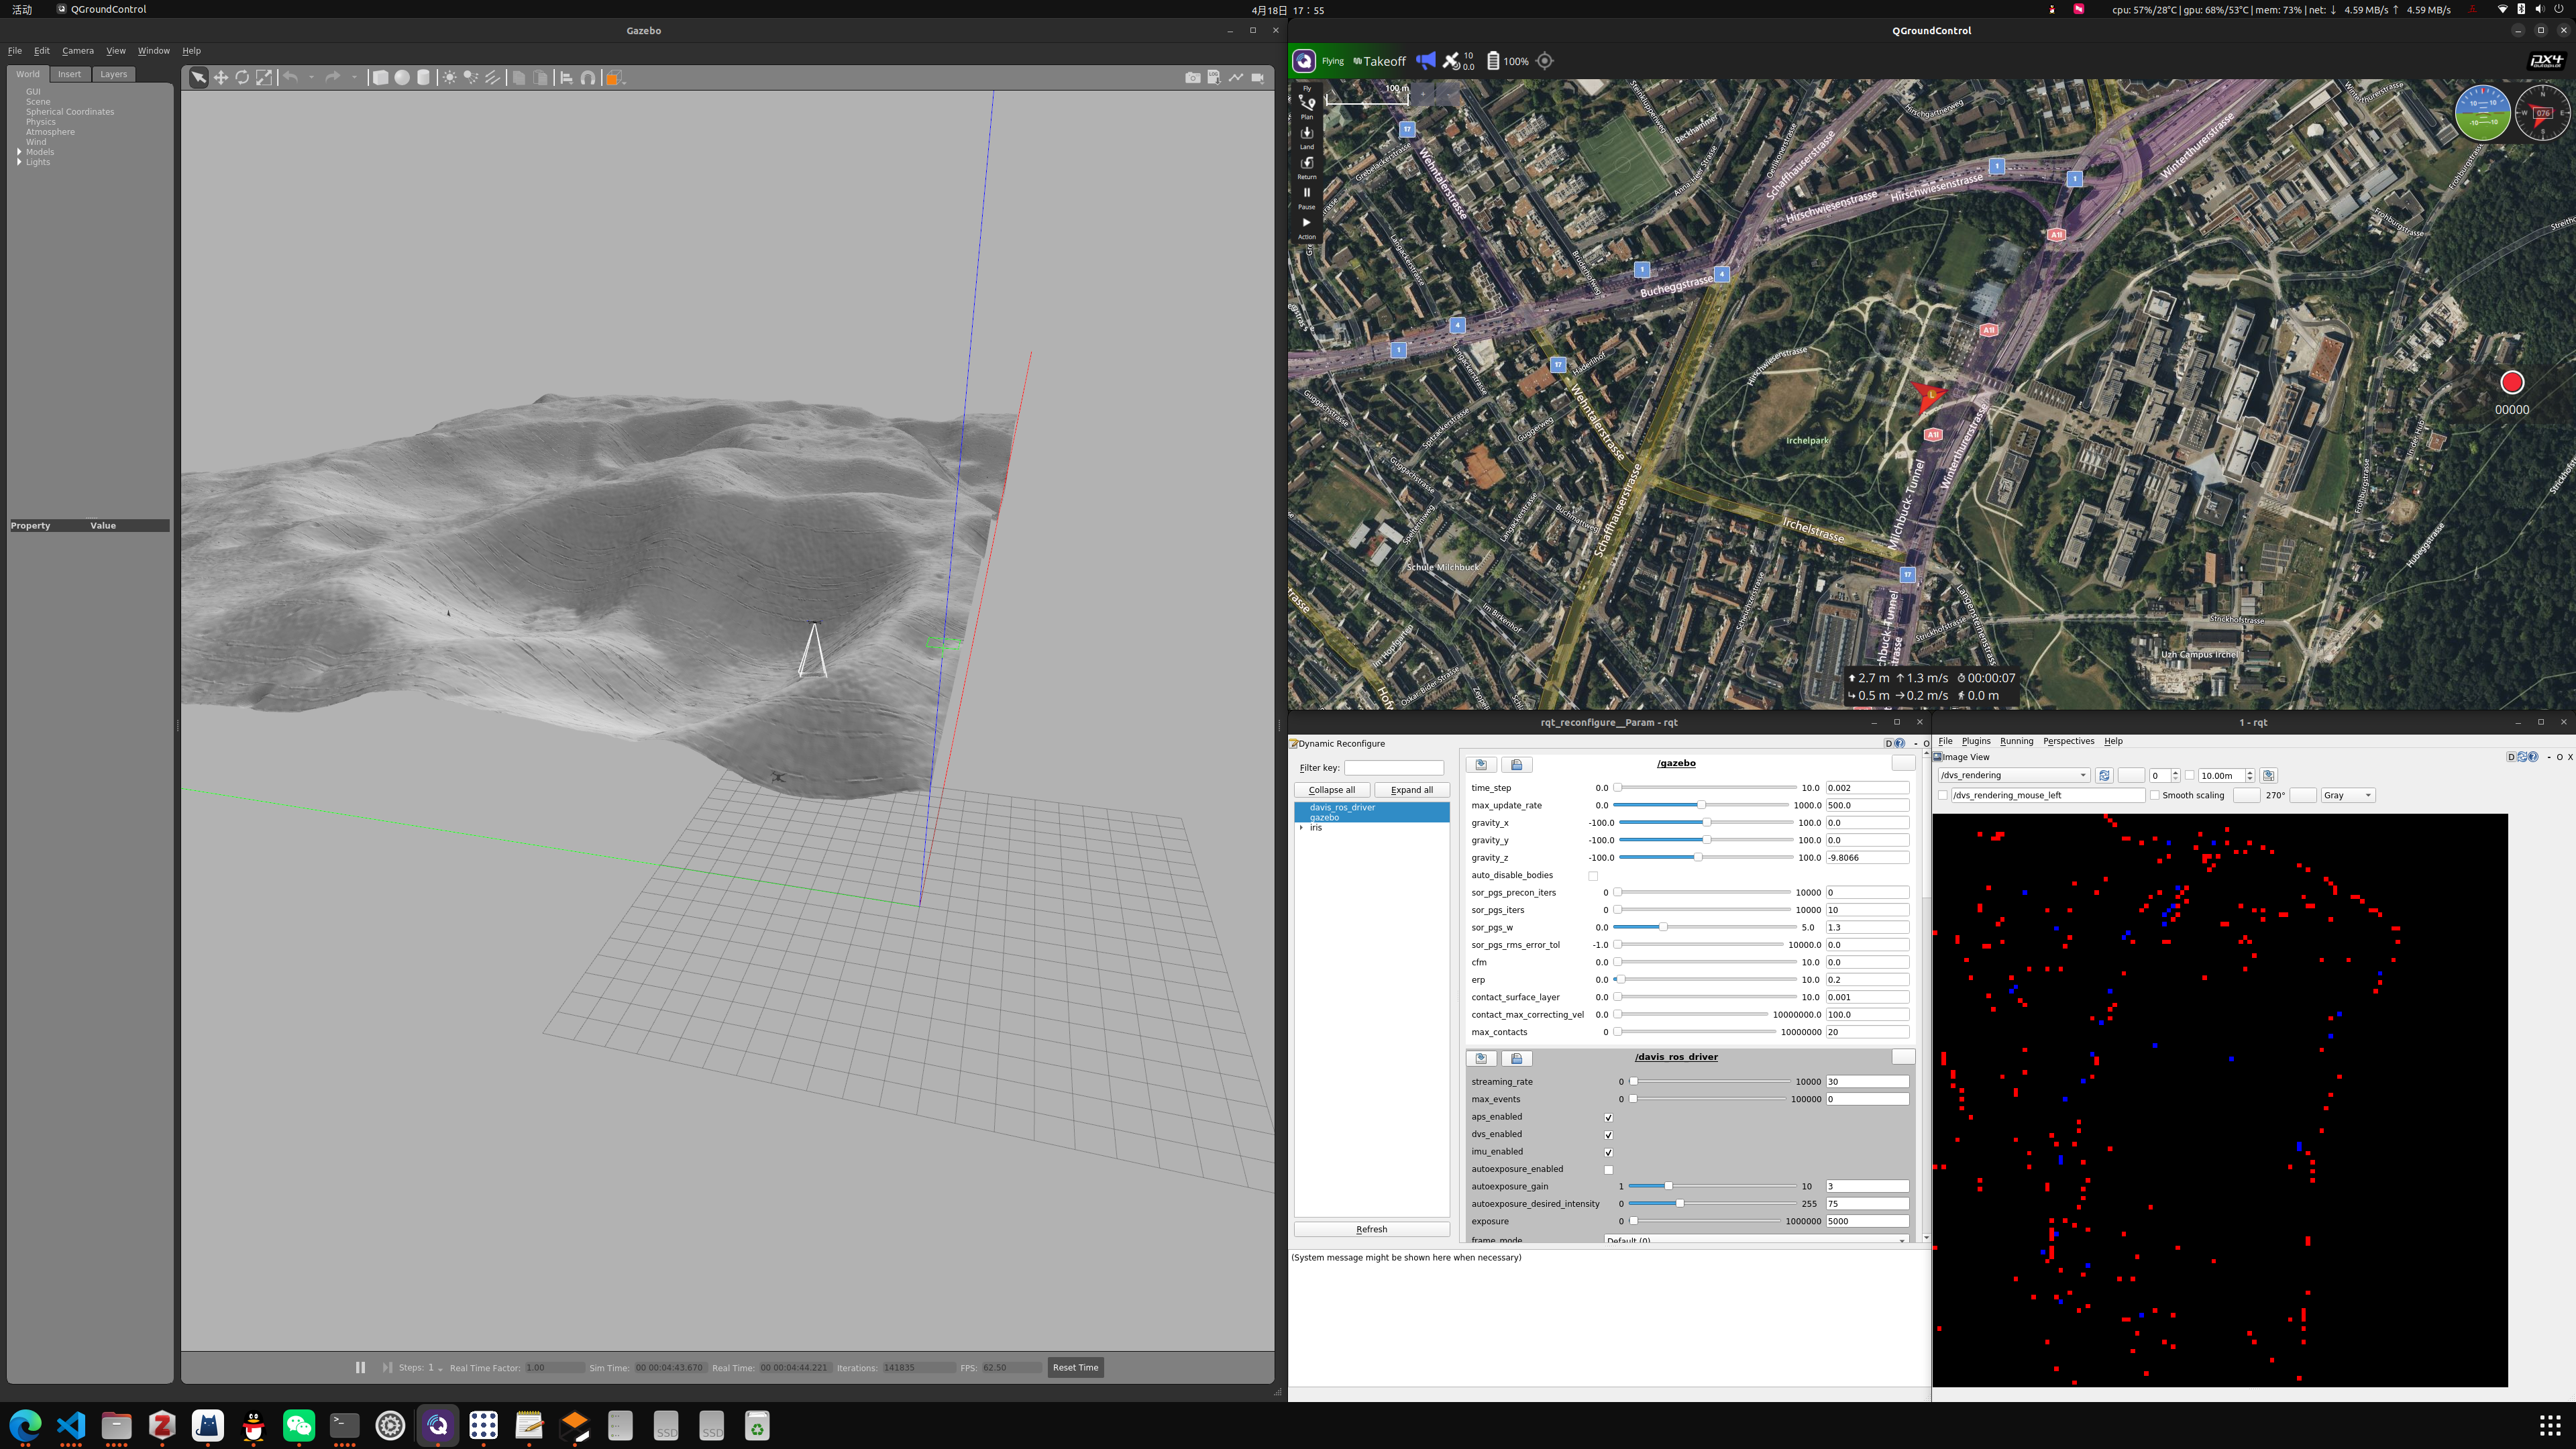
仿真配置
仿真环境基于Gazebo引擎,在ROS系统下配置,使用PX4飞控拓展和XTDrone无人机,首先请参照以下方式完成环境构建:
环境安装
与ros安装与使用心得 相同,安装ROS和PX4,然后安装Gazebo。推荐在docker容器中安装以保护系统环境,可参考XTDrone博客 。然后在构建容器前,注意为容器开启GPU的支持和图形界面支持,请仔细参考上述博客尤其是XTDrone博客以完成gazebo和ros的协同安装 。这里提供一个拉取自ros官方的镜像ros:noetic,使用其构建了一个自定义的镜像,如下所示:
1
2
3
4
5
6
7
8
9
10
11
12
13
14
15
16
17
18
19
20
21
22
23
24
25
FROM ros:noeticRUN echo "deb https://mirrors.tuna.tsinghua.edu.cn/ubuntu/ focal main restricted universe multiverse" > /etc/apt/sources.list RUN echo "deb https://mirrors.tuna.tsinghua.edu.cn/ubuntu/ focal-updates main restricted universe multiverse" >> /etc/apt/sources.list RUN echo "deb https://mirrors.tuna.tsinghua.edu.cn/ubuntu/ focal-backports main restricted universe multiverse" >> /etc/apt/sources.list RUN echo "deb https://mirrors.tuna.tsinghua.edu.cn/ubuntu/ focal-security main restricted universe multiverse" >> /etc/apt/sources.list RUN apt update && apt upgrade -y && apt install curl -y RUN sudo sh -c '. /etc/lsb-release && echo "deb http://mirrors.tuna.tsinghua.edu.cn/ros/ubuntu/ `lsb_release -cs` main" > /etc/apt/sources.list.d/ros-latest.list' RUN curl -s https://raw.githubusercontent.com/ros/rosdistro/master/ros.asc | sudo apt-key add - RUN apt update && apt upgrade -y && apt install git wget ninja-build exiftool ninja-build protobuf-compiler libeigen3-dev genromfs xmlstarlet libgstreamer1.0-dev libgstreamer-plugins-base1.0-dev python3-pip gawk -y RUN apt update && apt upgrade -y RUN mkdir -p /etc/ros/rosdep/sources.list.d/ RUN curl -o /etc/ros/rosdep/sources.list.d/20-default.list https://mirrors.tuna.tsinghua.edu.cn/github-raw/ros/rosdistro/master/rosdep/sources.list.d/20-default.list RUN useradd -m docker RUN usermod -aG sudo docker RUN echo "docker:123456" | chpasswd USER dockerRUN echo 'export ROSDISTRO_INDEX_URL=https://mirrors.tuna.tsinghua.edu.cn/rosdistro/index-v4.yaml' >> ~/.bashrc RUN echo 'source /opt/ros/noetic/setup.bash' >> ~/.bashrc RUN pip config set global.index-url https://pypi.tuna.tsinghua.edu.cn/simple RUN pip3 install packaging numpy empy toml pyyaml jinja2 pyargparse kconfiglib jsonschema future WORKDIR /home/docker CMD ["/bin/bash" ]
推荐在数据盘中下载XTDrone和PX4相关文件以节省系统空间,使用以下命令构建容器:
1 docker run -it --privileged --gpus all -e NVIDIA_DRIVER_CAPABILITIES=all -v ~/src/PX4-Autopilot:/src/PX4-Autopilot:rw -v /tmp/.X11-unix:/tmp/.X11-unix -e DISPLAY --network=host --name=p2 ros/noetic bash
然后在容器中安装gazebo,并增加以下环境变量:
1
2
3
4
5
6
7
export ROSDISTRO_INDEX_URL=https://mirrors.tuna.tsinghua.edu.cn/rosdistro/index-v4.yamlsource /opt/ros/noetic/setup.bashexport PATH=/home/docker/squashfs-root:$PATH source /src/PX4_Autopilot/Tools/setup_gazebo.bash /src/PX4_Autopilot/ /src/PX4_Autopilot/build/px4_sitl_defaultexport ROS_PACKAGE_PATH=$ROS_PACKAGE_PATH :/src/PX4_Autopilotexport ROS_PACKAGE_PATH=$ROS_PACKAGE_PATH :/src/PX4_Autopilot/Tools/sitl_gazeboexport GAZEBO_MODEL_PATH=$GAZEBO_MODEL_PATH :~/.gazebo/models
待gazebo、px4和ros都安装完毕后,容器中可以使用roslaunch命令检查安装情况。
构建传感器插件
ROS系统的一切插件都是使用sdf描述语言完成的,这里,构建的传感器需要包括普通光学相机、惯性传感器IMU,另外就是重要部分事件相机。我并没有完全弄明白传感器的继承关系,所以现在只能使用传感器的订阅与推送机制完成事件相机的仿真输出。首先,在PX4的根目录下,找到./Tools/sitl_gazebo/models文件夹,该文件夹下存放了所有的gazebo自带的模型,用户自定义的模型可以放在~/.gazebo/models目录下,也可以放在自带的模型目录下。在sdf文件中使用model://路径,即指代的是${PX4_ROOT}/Tools/sitl_gazebo/models目录下的模型。
在~/.gazebo/models目录下创建一个新的模型文件夹,命名为event_camera,在其中创建一个model.sdf文件和’model.config’文件,文件夹的结构如下:
1
2
3
event_camera ├── model.config └── model.sdf
在model.config文件中填写如下内容,这一部分主要是描述性质的内容,不影响模型的正常使用:
1
2
3
4
5
6
7
8
9
10
11
12
<?xml version="1.0" ?> <model > <name > event_camera</name > <version > 1.0</version > <sdf > model.sdf</sdf > <author > <name > Your name</name > </author > <description > A simple event camera model </description > </model >
在model.sdf文件中填写如下内容:
1
2
3
4
5
6
7
8
9
10
11
12
13
14
15
16
17
18
19
20
21
22
23
24
25
26
27
28
29
30
31
32
33
34
35
36
37
38
39
40
41
42
43
44
45
46
47
48
49
50
51
52
53
54
55
56
57
58
59
60
61
62
63
64
65
66
67
68
69
<?xml version='1.0'?> <sdf version ='1.7' > <model name ='event_camera' > <pose > 0 0 0 0 0 0</pose > <link name ="link" > <inertial > <mass > 0.015</mass > <inertia > <ixx > 4.15e-6</ixx > <ixy > 0</ixy > <ixz > 0</ixz > <iyy > 2.407e-6</iyy > <iyz > 0</iyz > <izz > 2.407e-6</izz > </inertia > </inertial > <collision name ='collision' > <geometry > <box > <size > 0.01 0.01 0.01</size > </box > </geometry > <max_contacts > 10</max_contacts > <surface > <contact > <ode /> </contact > <bounce /> <friction > <ode /> </friction > </surface > </collision > <visual name ='visual' > <geometry > <box > <size > 0.01 0.01 0.01</size > </box > </geometry > </visual > <sensor name ='camera' type ='camera' > <camera name ='__default__' > <horizontal_fov > 1.8</horizontal_fov > <image > <width > 128</width > <height > 128</height > </image > <clip > <near > 0.1</near > <far > 100</far > </clip > </camera > <always_on > 1</always_on > <update_rate > 400</update_rate > <visualize > 1</visualize > <plugin name ='camera_controller' filename ='libgazebo_dvs_plugin.so' > <sensorName > dvs</sensorName > <robotNamespace > /</robotNamespace > <eventThreshold > 20</eventThreshold > <eventsTopicName > events</eventsTopicName > <imageTopicName > image_raw</imageTopicName > <cameraInfoTopicName > camera_info</cameraInfoTopicName > </plugin > </sensor > <self_collide > 0</self_collide > <kinematic > 0</kinematic > </link > </model > </sdf >
说明:libgazebo_dvs_plugin.so动态链接库是后面将要编写的事件相机插件,在<plugin>字段中定义的全部变量,可以与插件进行交互,后续在软件工程的目录中说明,其余字段是定义事件相机的参数模型。
然后,回到用户目录下cd ~,使用ROS指令创建工作空间(如果有了就不用创建了):
1
2
3
4
5
mkdir -p ~/catkin_ws/srccd ~/catkin_ws/srccatkin_init_workspace cd ..catkin_make
可将工作空间的环境变量添加到~/.bashrc文件中,以便每次启动终端时自动加载:
1 source ~/catkin_ws/devel/setup.bash
然后来到catkin_ws/src目录下,创建一个新的包,命名为gazebo_dvs_plugin:
1 catkin_create_pkg gazebo_dvs_plugin rpg_dvs_ros std_msgs sensor_msgs roscpp
指令将自动查找并安装对应的模块包,但是,rpg_dvs_ros包是瑞士ETH研究团队开发的DVS驱动库,不一定能够自动安装,需要手动安装,可前往其github ,根据其安装说明完成安装,在安装过程中,库libcaer-dev可能会报错找不到目录,此时,需要在github上查找该库(也是同一团队开发)并将其克隆至src目录下,再使用编译指令catkin build完成编译安装。
然后,请直接克隆如下地址的插件项目,
1
2
3
cd ~/catkin_ws/srcgit clone git@github.com:BugBubbles/gazebo_dvs_plugin.git catkin build
完成插件的构建,此时将在本地目录~/catkin_ws/devel/lib中生成一个libgazebo_dvs_plugin.so的动态链接库文件,该文件就是gazebo仿真器将要调用的插件接口。此时可以搭建一个事件相机模型,这里为了省事,就不增加新的三维mesh模型,忽略了事件相机的真实几何尺寸,此处以使用iris无人机为例,在目录/path/to/PX4_Autopilot/Tools/sitl_gazebo/models下找到一系列以iris开头的文件夹,任意选取一个作为参考,例如,可以新建文件夹名为iris_evt_cam的带事件相机无人机模型,然后在文件夹中加入文件iris_evt_cam.sdf:
1
2
3
4
5
6
7
8
9
10
11
12
13
14
15
16
17
18
19
20
21
22
23
24
25
<?xml version='1.0'?> <sdf version ='1.5' > <model name ='iris_evt_cam' > <include > <uri > model://iris</uri > </include > <include > <uri > model://event_camera</uri > <pose > 0 0 0 0 90 0</pose > </include > <joint name ="evt_cam_joint" type ="fixed" > <child > event_camera::link</child > <parent > iris::base_link</parent > <axis > <xyz > 0 -1 1</xyz > <limit > <upper > 0</upper > <lower > 0</lower > </limit > </axis > </joint > </model > </sdf >
同时新建文件models.config:
1
2
3
4
5
6
7
8
9
10
11
12
13
14
15
16
<?xml version="1.0" ?> <model > <name > 3DR Iris with event camera</name > <version > 1.0</version > <sdf version ='1.4' > iris_evt_cam.sdf</sdf > <author > <name > Yourname</name > <email > Yourname@gmail.com</email > </author > <description > This is a model of the 3DR Iris Quadrotor with an event camera. The original model has been created by Thomas Gubler and is maintained by Lorenz Meier. </description > </model >
在发布文件中修改发布的无人机模型为iris_evt_cam,即可查看事件相机拍摄结果。仿真环境的构建将在下一章中提出。


